
The Goal
As soon as the good weather comes back, the music season starts as well as the outdoor parties. Most groups use a normal PA system and a generator for electricity which is a working solution. There are some downsides to this like noise and fumes. As some parties are not officially permitted, you have to keep the disturbance low as possible.
I was asking myself if we can do all this without a generator and with a sufficient volume for around 50 people. This is were the project started.
List of Parts Used
The following parts were used for this project. It is possible that something is missing.
A lot of 12mm MDF was used for all speakers and the amplifier.
Tops:
- 2 x Visaton BG 20 - 8"- 8 Ohm
- 2 x GHXAMP Tweeter - 2" - ~5 Ohm
- 4 x Recessed handle
- 8 x Speaker corners
- 8 x Speaker rubber feet
- 2 x Speaker stand mounting
- 2 x RCA terminal
- 2 x GHXAMP 2 way crossover frequency divider
- Sealing
- Cabling
- 2 x speaker mesh
Subwoofer:
- 2 x mivoc AW 3000 - 12" - 4 Ohm
- 2 x PVC pipe
- 2 x Recessed handle
- 8 x Speaker corners
- 4 x Speaker rubber feet
- 1 x RCA terminal
- 2 x Speaker mesh
- Sealing
- Cabling
Amplifier:
- 1 x Aiyama TPA3116 2.1 Amplifier Bluetooth
- 1 x Digital Voltmeter
- 1 x Led power button switch
- 1 x 24v 10ah 6s6p battery pack
- 1 x 4 port spring clip speaker terminal
- 1 x 2 port spring clip speaker terminal
- 1 x Speaker handle strap
- 1 x DCin thingy :P
- 1 x Blanko panel
- Cabling
- 1 x 10a fuse
First test
I was a bit impatient and first and wired everything together for a small test. Everything was working but without a proper case there was no good sound. The power source is an old laptop power supply. The TPA3116 amplifier works with power sourcs from 12v to 24v.
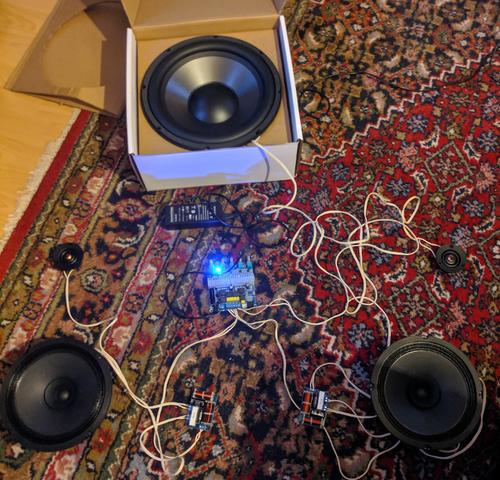 The first tes setup on the floor
The Tops
I got my pen and paper and did a small design for the top speakers. I wanted a 2-way system because some of the music I like has nice high frequencies. The front plate is pushed a bit back because I was planning to add a full mesh on the whole front. Beside the speaker holes, there are two holes for the handles, one at the bottom for the stand and one at the back for the RCA terminal. I used glue and screws together. The speakers fell already once from some height and survived!
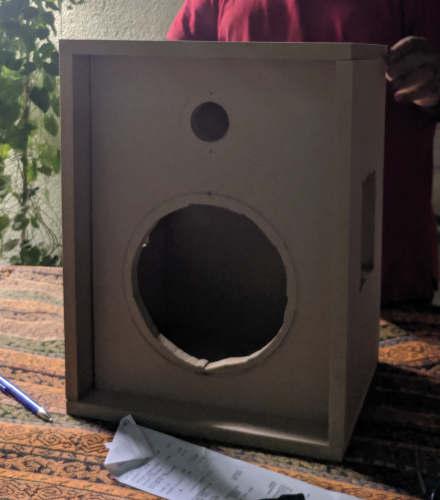 The top speaker glued together
I did this whole process two times for two speakers and let it dry overnight. Then I wired everything with the frequency divider and put both speakers inside the speaker cases. A first test really suprised me. The speakers sounded really good for my amateur ears.
 Testing both top speakers the first time
The Subwoofer
Building the subwoofer was bit trickier. The subwoofer is way bigger then tops and has around 90 liters. For stability purposes I added more MDF inside as you can see in the following picture. Again I used screws and glue together. I do not know the exact weight but it is really heavy. Furthermore, I added a bass reflex pipe 10cm wide and 10cm long for a setting of 90hz iirc (For outdoor).
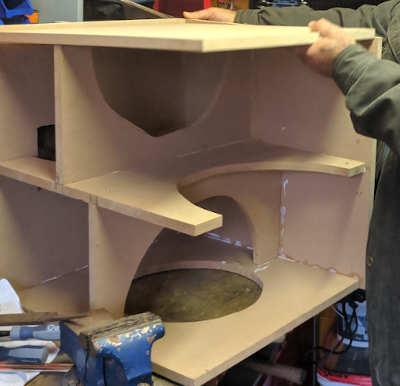 Glueing the subwoofer together
This setup of the subwoofer changed later on and I added another subwoofer inside it but we will talk about this later.
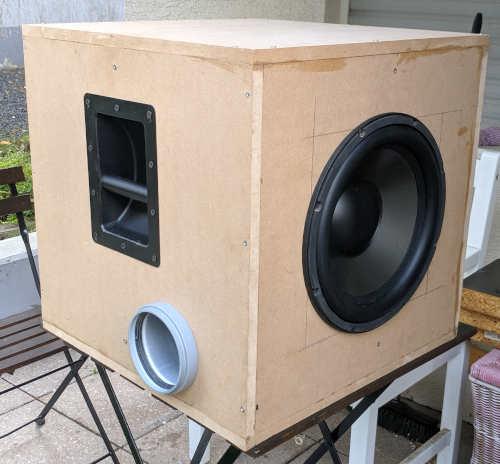 Putting in the speakers and the bass reflex pipe
Amplifier and power
Now that the speakers were finished, the most interesting part started. I had to build the amplifier system. I used a 24v 6s5p setup for the battery and added a power button and a 10a fuse for safety reasons. It worked with the TPA3116 and the speakers.
 Testing the battery setup
I needed a enclosure for this whole system so I bought more MDF and a big blanko terminal. There I made whole for all required ports and added a voltmeter to see how much battery power is left and how much the system is using at the moment. What I somehow forgot are ports for the input but this will be added.
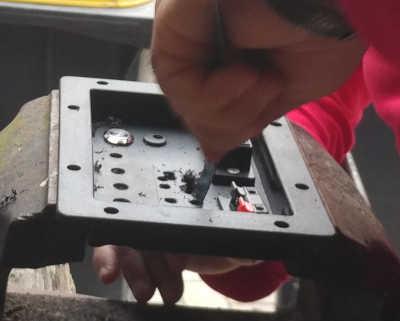 Preparing the panel
Everything wired together looked liked this from the back and the inside.
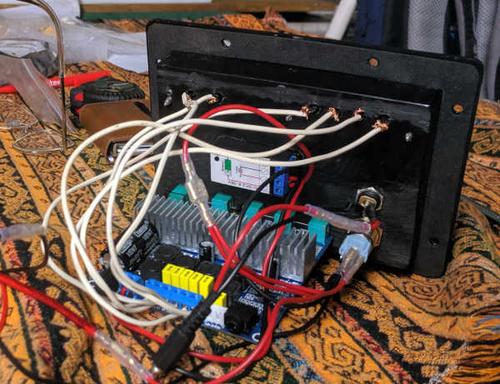 Putting the panel together
This whole block then went into a MDF enclosure again.
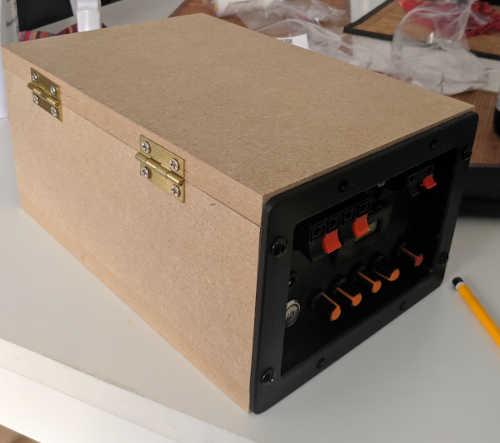 Putting the amplifier together
Painting
MDF is not really the suitable material for outdoor speakers. It sucks up moisture and is heavy. Multiplex would be a better choise and you could use thiner material. Never the less it had to get painted. For paint I used white warnex paint which is recommended for these kind fo setups
 Painting the speakers
Finish
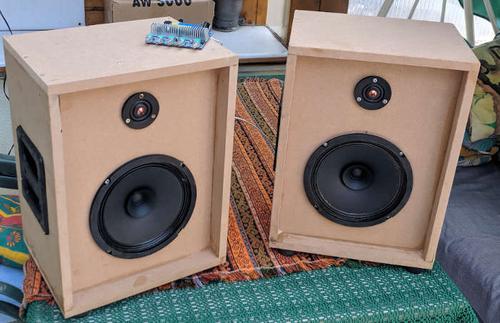
After putting everything together the speakers looked like this. I also added some stickers but they do not hold so well on the paint.
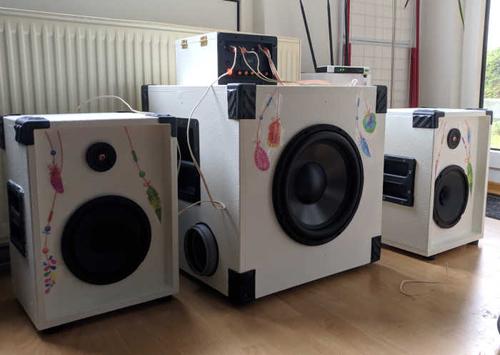 Finished speakers
Testing
I took the speakers out for the first time and testesd them with some of my favourite music. All I can say that I am pretty satisfied with the endproduct. The sound is loud and detailed. The subwoofer is enough and not so loud from far away. I can recommend this kind of setup if you want to make some parties outside.
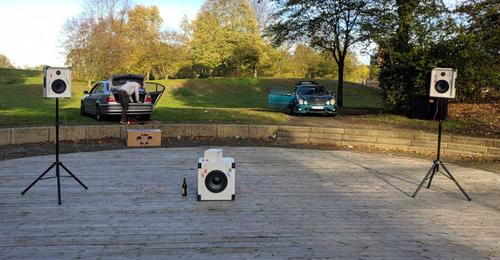 Testing the speakers outside
Battery power
I could only test the speakers once for a longer time. I think they could run with this battery for five hours on full volume. Full volumes is really loud. With less it will even work for longer. I use these speakers at home for example at a low volume in my room and I have only charged them up once this year.
Subwoofer Upgrade
Some people recommended me to add another AW 3000 to the subwoofer enclosure because the 90 liter volume would be better for two. I added another bass reflex port as well but I do not have the pictures at hand. I think this change made quite a difference.
Future ideas
- Two small subs for each top
- Smaller top enclosure
- Give each side an own amplifier and battery.